Install guide
Everything you need to get a Ubikron server running and your investigators connected. Written for whoever looks after your infrastructure.
Also: macOS PKG, which installs without an internet connection, and Linux ARM64.
Or read it all offline: full install guide (PDF).
Local install
Install the server on the same machine as your Chrome extension. The usual way to try it without a VPC or dedicated infrastructure.
Before you start: Docker installed and running. Docker Desktop works on Windows and Mac. The installer checks the machine first:
| Minimum | Recommended | |
|---|---|---|
| Processor | 4 cores | 8 cores |
| Memory for Docker | 16 GB | 32 GB |
| Free disk | 20 GB | 100 GB |
- Make sure Docker is running.
- Download the installer for your operating system (above).
- Run the installer. On a desktop it opens in your browser. Add
--clito stay in the terminal. - Choose where to install, for example
d:\data\ubikron-server\or/data/ubikron-server. The directories are created for you. - At "Select your install type", pick Single user - install on Localhost only.
- Enter your organisation identifier (lowercase letters, digits and dashes, for example
acme-corp). - Choose the admin password, at least 8 characters. It signs you in to both Ubikron and Mimic.
- Wait for the images to download and the containers to start. The first start takes a while.
- Open the admin interface at the address shown.
# Linux / Mac: make it executable
$ chmod +x ubikron-pro-server

# Linux: run as root
$ sudo ./ubikron-pro-server

# Stay in the terminal instead of the browser
$ ./ubikron-pro-server --cli

# Open the browser installer even if no desktop is detected
$ ./ubikron-pro-server --gui

# The installer will:
- check Docker, processor, memory and disk
- generate random passwords for all services
- ask for your organisation and an admin password
- fetch the Docker images (be patient)
- start all 11 containers, Mimic included

Server is up!
Mac: both the binary and the PKG are signed. The PKG installs to /usr/local/bin and is stapled, so it verifies without an internet connection.
Dedicated server
Install on a separate machine: on your premises, in a private network, on a VM, or in a VPC such as EC2 or Linode. The normal setup when several investigators share a server.
- Make sure Docker is running on the target machine.
- Download the installer for the server's operating system.
- Run the installer (on Linux, as root with
sudo). On a machine without a desktop it runs in the terminal. - Choose where to install, for example
/data/ubikron-server. - At "Select your install type", pick Multi-user - VPC / private network.
- Choose a DNS name. Anything you'll remember. A DNS4SSL.net name is generated for it, for example
myserver-ab12.dns4ssl.net. - Select the network interface your investigators will connect to.
- Enter your organisation identifier and choose the admin password (at least 8 characters, for Ubikron and Mimic).
- Wait for DNS, the certificate, the image downloads and container startup.
Reinstalling and want the same name? Enter the full name (for example myserver-ab12.dns4ssl.net) and you'll get it back, as long as you can reach the original IP address.
$ sudo ./ubikron-pro-server --cli
Docker is already installed - good!
Docker is running - good!
Install in current directory? (y/n): n
Enter absolute path to install directory: /data/ubikron-server
System requirements:
OK Processor cores: 12 cores
OK Memory available to Docker: 32 GB
OK Free disk space: 180 GB

Select your install type:
  1) Single user - install on Localhost only
  2) Multi-user - VPC /private network
Select option [1/2]: 2

Enter the DNS name you want to use
(e.g. 'myserver' for myserver.dns4ssl.net): test
Generated DNS name: test-pb56.dns4ssl.net

Multiple IP addresses found:
  1) 203.0.113.23   (public)
  2) 10.0.0.170     (local)
  3) 192.168.56.1   (local)
Select interface / IP address to be used for DNS: 2

Requesting certificate from provider...
Certificate and key installed
Generated passwords...

Enter your organisation identifier: acme-corp
Choose a password for the admin account
(used for both Ubikron and Mimic): ********
Admin password set.

Server is up!
Admin: https://test-pb56.dns4ssl.net
Mimic: https://test-pb56.dns4ssl.net/mimic/
| Port | Purpose |
|---|---|
| 80 | HTTP, for certificate validation |
| 443 | HTTPS, web interface and API |
| 7001 | Ubikron extension communication |
Roll your own: custom DNS and certificates
For organizations with their own PKI. Ubikron needs a real TLS certificate. Self-signed won't work: that's Chrome's rule, not ours.
- Pick a DNS name and point it at the IP address the server will run on.
- Issue a certificate from your CA:
server.crtandserver.key, PEM format. - Create a directory on the host:
mkdir /ubikron-server - Copy in the docker-compose.yaml we provide.
- Create a
certssubdirectory and putserver.crtandserver.keyin it. - Create a .env file in the server root with your settings and passwords. Your DNS name goes in
S3_PUBLIC_URL(followed by/cdn),ZITADEL_PUBLIC_URLandZITADEL_EXTERNAL_DOMAIN, and your organisation identifier inMIMIC_ORG_NAME. - Start it:
docker compose up -d
Generate every secret yourself. Don't copy the example values. The table shows how to make each one.
| Value | Make one with |
|---|---|
The _PASSWORD values | openssl rand -hex 8 |
STORAGE_ACCESS_KEY | openssl rand -hex 10 |
STORAGE_SECRET_KEY | openssl rand -hex 20 |
JWT_BASE64_SECRET: Base64, at least 256 bits | openssl rand -base64 64 |
MIMIC_SECRET_ENCRYPTION_KEY: Base64, 32 bytes | openssl rand -base64 32 |
ZITADEL_MASTERKEY: exactly 32 characters | openssl rand -hex 16 |
MIMIC_SERVER_KEY: servk_ and 32 random bytes | echo servk_$(openssl rand -base64 32 | tr '+/' '-_' | tr -d '=') |
UBIKRON_ADMIN_PASSWORD_HASH: the admin password as a bcrypt hash, Base64 encoded | docker run --rm httpd:2.4-alpine htpasswd -nbBC 10 "" 'your-password' | tr -d ':
' | sed 's/^$2y/$2a/' | base64 -w0 |
# .env (example values)
S3_PUBLIC_URL=https://ubikron.acme.com/cdn
S3_PUBLIC_PORT=8333
JHIPSTER_REGISTRY_PASSWORD=f843f4972db8cbc2
ELASTIC_PASSWORD=4fa045782eaae8a4
POSTGRES_PASSWORD=4ff403f10dbd7372
RABBITMQ_PASSWORD=e3e65455710b715d
STORAGE_ADMIN_PASSWORD=143f3287b4628df2
STORAGE_ACCESS_KEY=36a0752ec021d626e2fc
STORAGE_SECRET_KEY=a4cff31f934684a5d8adce51f4ad8092786ea89b
WUD_ADMIN_PASSWORD=3eb906d8bc1d4656
JWT_BASE64_SECRET=R9gVF5Sg/s3axdeI7tZmcWdlAdb+5geqzJ0X87OTuheA3vhrzy7rQ41qG4eaw6h++WaMZLqUbXndtKMy8Q17eg==
ZITADEL_MASTERKEY=ByohDPXTT4VTzKyxhMnBdTuF6GzH5aGf
ZITADEL_DB_PASSWORD=H8QfvBGGsrCKkIkETxOuaTP5
ZITADEL_SETUP_PASSWORD=kVMi6SDm!S8XH1Cf0oVIataDpqjzAJl93
ZITADEL_PUBLIC_URL=https://ubikron.acme.com
ZITADEL_EXTERNAL_DOMAIN=ubikron.acme.com
ZITADEL_EXTERNAL_PORT=443
ZITADEL_EXTERNAL_SECURE=true
MIMIC_ORG_NAME=acme-corp
MIMIC_SERVER_KEY=servk_tkfiQqRTMCs9AG3IC5vq4bgXOMJ_Yf246zrnef5Fh7o
MIMIC_SECRET_ENCRYPTION_KEY=vrqvCvitCxKYvQkV8hG4ggcOdsJp3wS2DEbHn0dOwRU=
UBIKRON_ADMIN_PASSWORD_HASH=JDJhJDEwJGprSjVDOVMycjByOEkxRzVBak9lOVRVY3hwaUxxQ242NTVKMUNja3R5YjljY3gwbzh2c2tG
$ ls -la /data/ubikron-server/
drwxr-xr-x  certs/
-rw-r--r--  docker-compose.yml
-rw-r--r--  .env
drwxr-x---  volumes/

$ ls -la certs/
-rw-r--r--  server.crt
-rw-r-----  server.key
Tip: the first start takes time while services wait for each other. Warnings in the logs are normal.
First use and administration
Open the admin interface at the address the installer gave you. Sign in as admin with the password you chose during the install, and accept the terms. Mimic is at /mimic/ on the same address, with the same login.
Next you're asked for a license key. No key yet? Click Skip. You get the free Try server (Free on the license page): 1 user and 2 projects, signing in with your existing Ubikron license. Enough to see how it works.
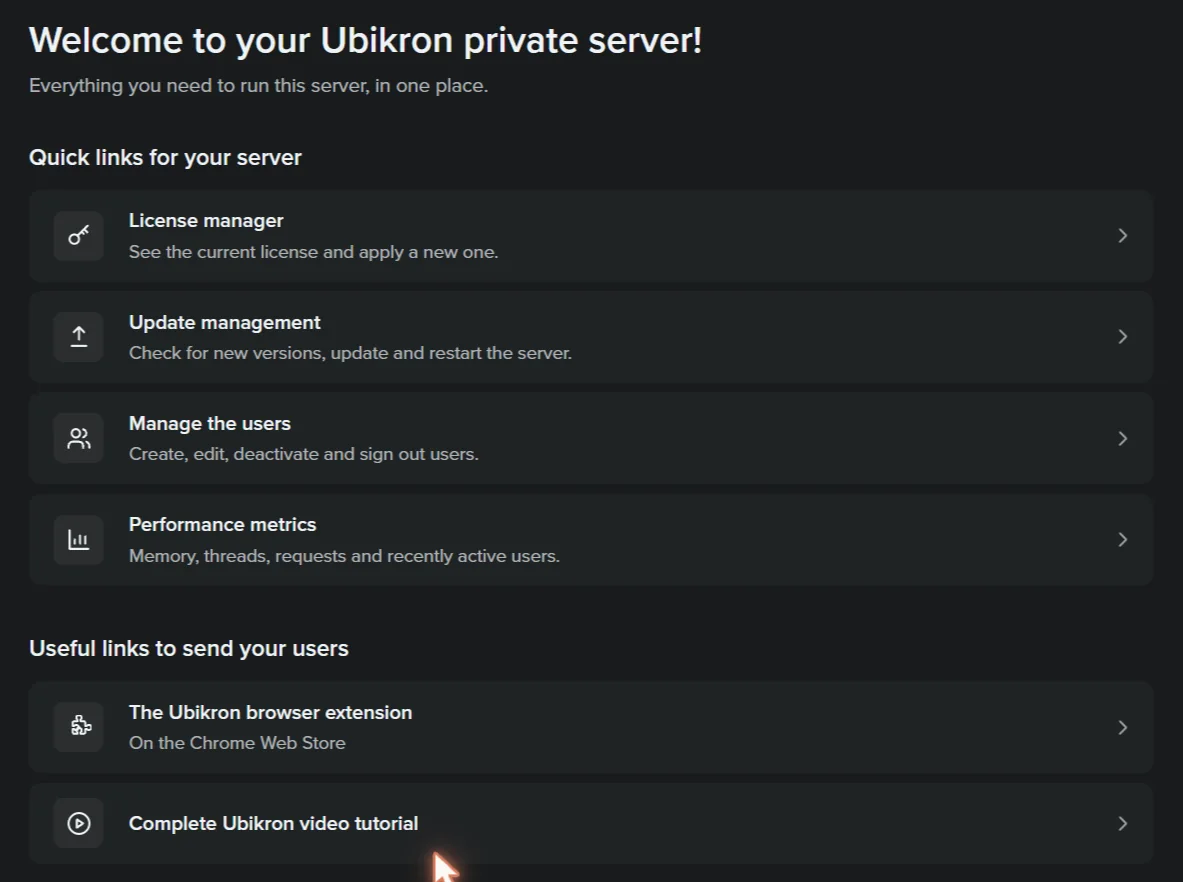
Then you're on the overview, with links to everything below. The admin screens come in light and dark; these are dark.
Adding users
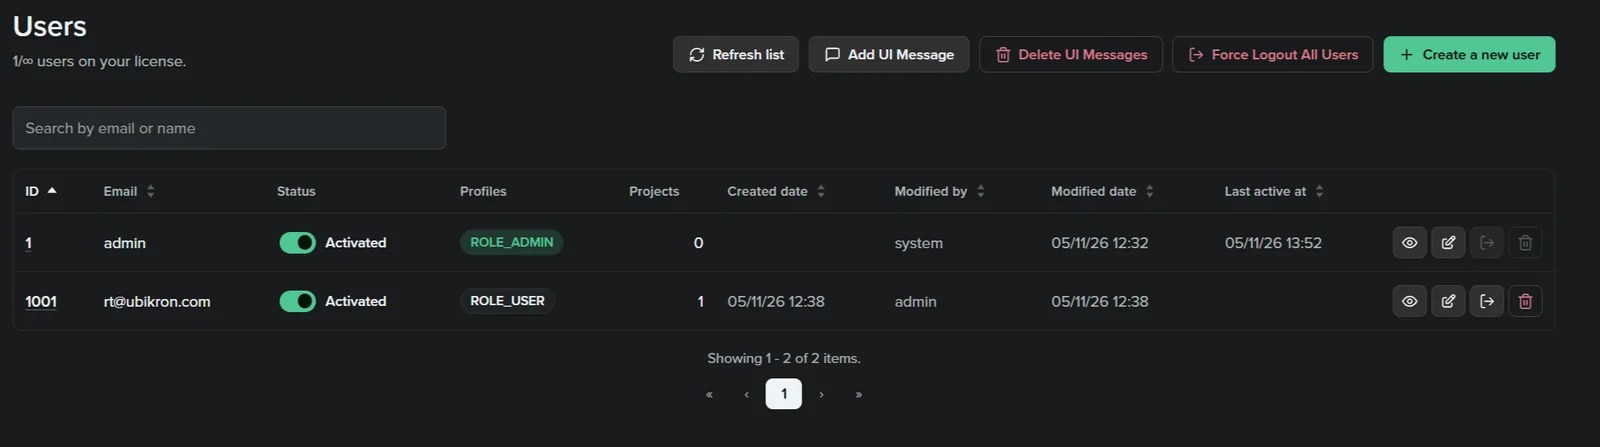
From the overview: Manage the users, then Create a new user.
- Email: an identifier only. The server never sends email. A dummy domain is fine, for example
analyst@company.local. - Password, twice
- First and last name
- Profile: ROLE_USER or ROLE_ADMIN
Saving creates a default project for the user. It takes a few seconds.
The user list shows each user's projects and when they were last active, with buttons to view, edit, sign out or delete them. Above it:
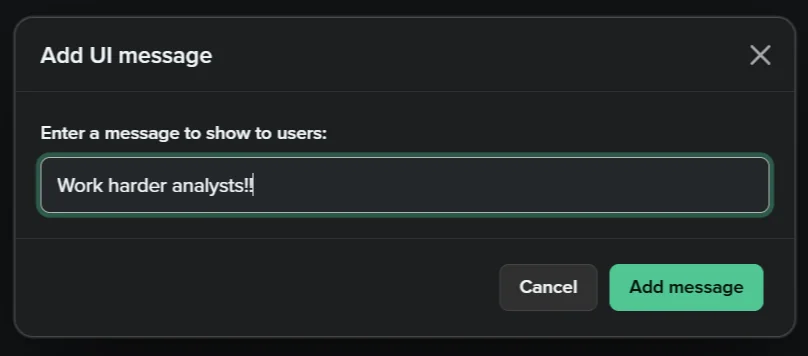
- Add UI Message shows a message to all your users. Delete UI Messages takes it down.
- Force Logout All Users signs everyone out, for example before maintenance.
Updates
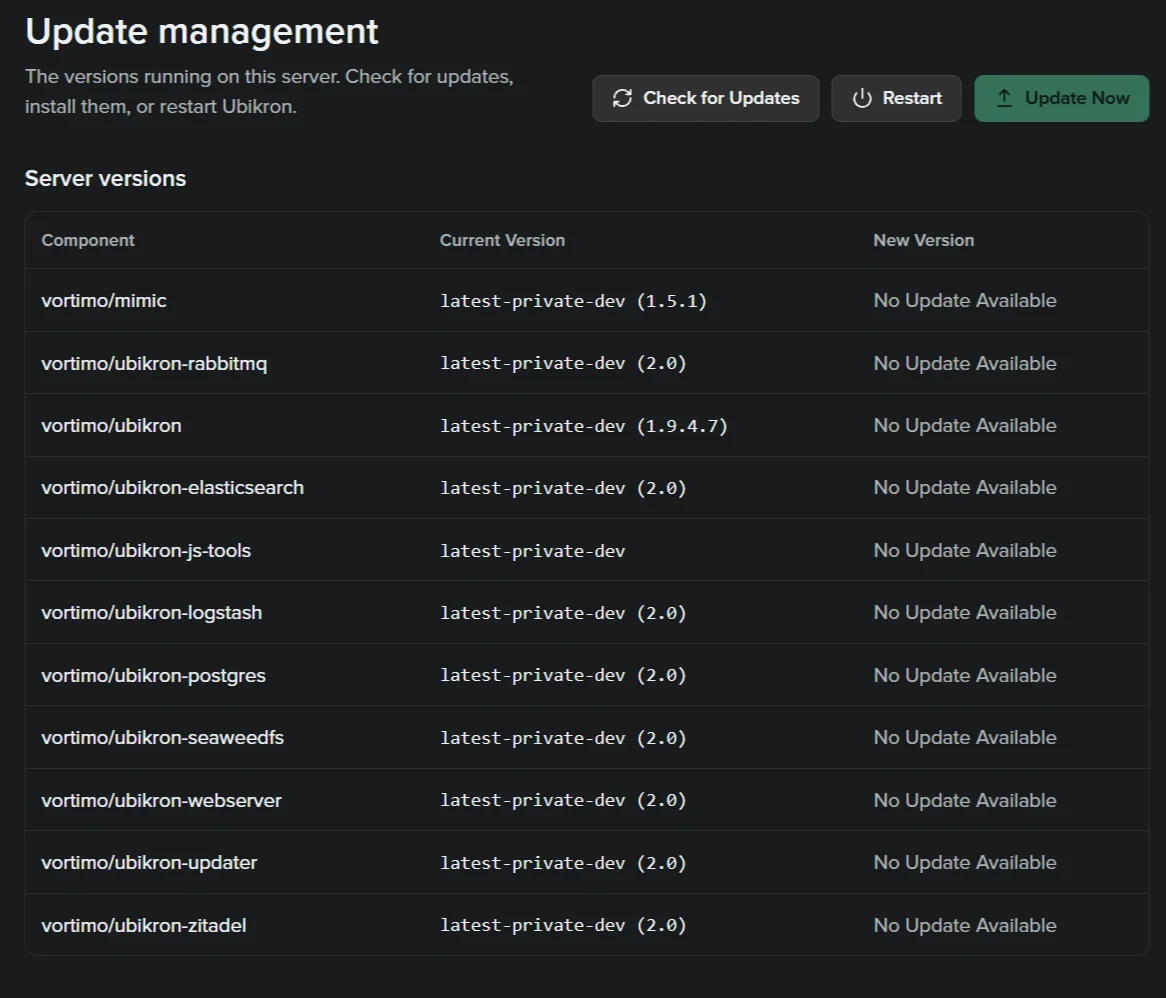
A container checks Docker Hub hourly. When there's an update, your users are told in the extension. Update Management lists every component and its version: click Update Now to install, or Restart to restart Ubikron.
The server is briefly unavailable during an update and the admin screen may show errors. Reload after a minute. That's normal.
License keys
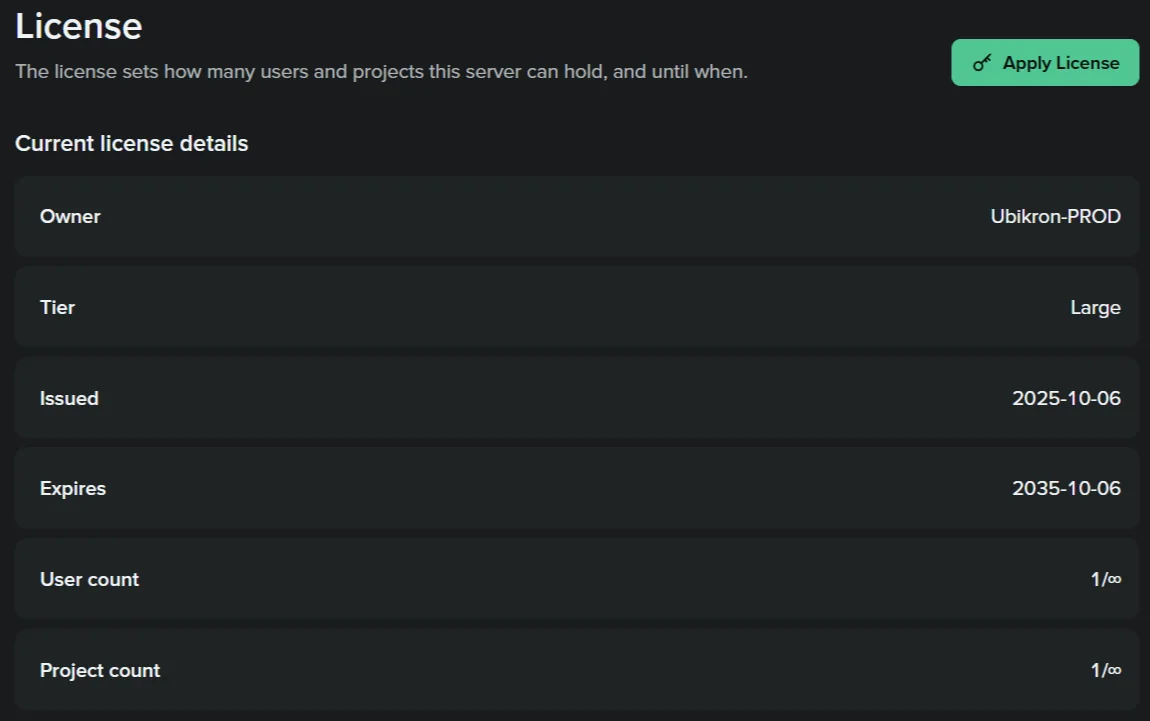
License manager, then Apply License, paste the key. You'll see the owner, tier, issue and expiry dates, and user and project counts. Click Update.
Metrics
Performance metrics shows memory, threads, CPU and recently active users.
| Tier | Users | Projects |
|---|---|---|
| Try | 1 | 2 |
| Small | 5 | Unlimited |
| Unit | 30 | Unlimited |
Projects on the Try server means projects it holds at once. Users can export projects to cold storage to free up room, but can't create new ones beyond the limit.
Connecting the extension
Your investigators use the same Ubikron extension. They just log in to your server.
- Install the Ubikron extension if it isn't installed.
- On the login screen, find Private Server at the bottom and click Login.
- The interface turns from red to green and asks for a server address, email and password.
- Enter your server's DNS name, for example
test-pb56.dns4ssl.net. For a local install use127.0.0.1orlocalhost. - Enter the email and password the admin created.
- Click Login.
Switching back: click Public Server on the login screen. The extension remembers both.
A real certificate is required. The extension and server must talk over TLS with a certificate the browser trusts. Self-signed certificates and SSL warnings mean the extension won't connect. That's a Chromium restriction.
Troubleshooting
Forgotten admin password
- Go to the server installation directory.
- Open the
reset-passwordsubdirectory. - Create a file called
reset-admin.txtin it. Empty is fine. - Wait a few minutes. The server checks for it periodically.
- The password is now admin. You'll set a new one when you log in.
Mac says "Operation not permitted"
macOS checks the binary's signature with Apple, which needs an internet connection. On a weak or missing connection you'll get this error. Use the PKG installer instead: it's stapled and verifies offline. It installs to /usr/local/bin/ubikron-pro-server.
Where the data lives
The install directory holds all Ubikron data. Deleting containers, images and volumes doesn't touch it.
- Reinstalling: point the installer at the same directory to keep your data, users and projects.
- Removing everything: delete the install directory.
Shared machines
On a shared Linux box, the server isn't protected from other users on that machine. Access to the server is access to Ubikron data. Use strong passwords, close unused ports, turn on the firewall.
$ cd /data/ubikron-server
$ touch reset-password/reset-admin.txt

# wait a few minutes...
# the password is now "admin"
# log in and set a new one
SSL warnings in the browser? The extension won't work with them. Use a real certificate, not a self-signed one.
Containers not starting? The first start takes time. Services wait for each other and the logs fill with warnings while they do. Give it a few minutes.
Still stuck? Tell us what you're seeing.